
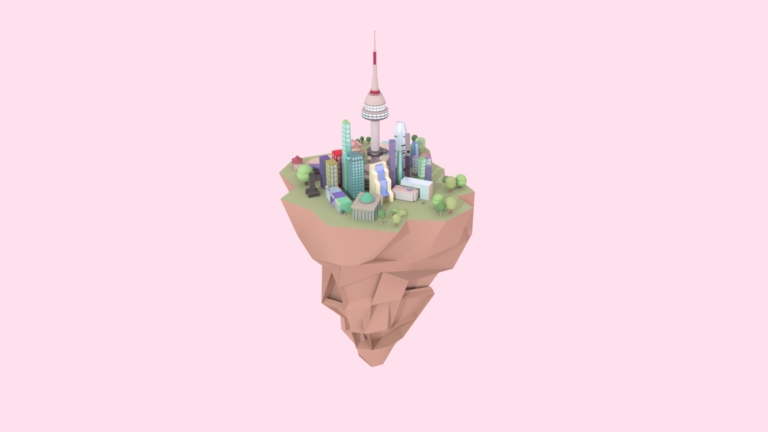
For the development section I have focused on mainly my Maya work contributed to the group on the floating city and how I used different videos to help me achieve certain tasks.
Rendered Images of my Pieces for the Project using Maya Software Render and then Arnold-
However as they rendered out they were darker than expected but on Fridays class we were taught a way to fix that problem hopefully that works.
First Renders-


Second Renders- Hopefully this are better-


My first attempt at creating a model was trees. As I was very nervous about Maya I decided to start small and simple. For this I did some research on Youtube to see if there were any videos that could help me as I was still uncertain to how Maya worked. These tress were to be placed throughout the city.
Reference- Below is that video-
While watching this video I learned a lot even though I only watched the first couple of minutes it really helped me in creating the trees I did below. The first one I did was similar to the one in the video but it gave me enough help to create the other two. By using the vertices I was able to create the shapes of the trunk and the bush which helped me later on in my modelling.
Below is the trees I modelled


Next I began working on the blossom trees that can be seen within Seoul. There was also a video on Youtube that helped me through this exercise as well which can be seen below. What drew my attention to this video was the low poly look that matched our style we were going for perfectly. This video also showed me the importance of subdivisions which really helped me later in the creations of our project, as this was very important to me in creating the generic buildings that I did later.
Reference-Below is that video-
Below are the trees I modelled-


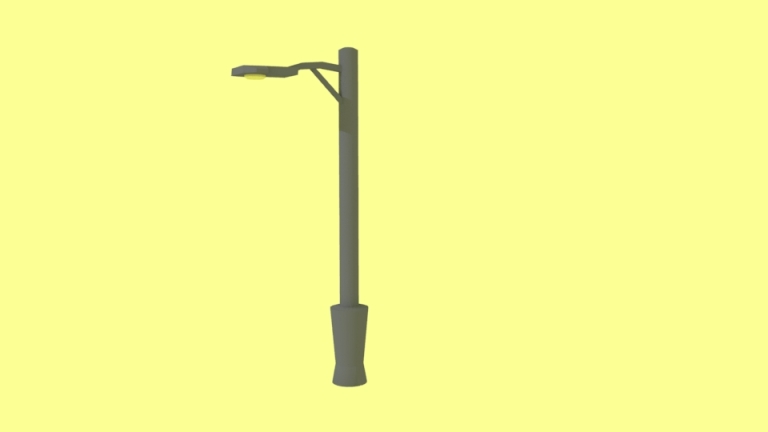
Next I looked for a video on modelling a street light in Maya as I was watching more videos and was learning new things the stress of not being able to do anything started to subside. This video helped me with the extrude tool and how to use it to get certain shapes from the same object. The below that also helped me come to terms with the tool and some of the functions that it is able to perform this really helped me later when it came to making the buildings for our city.
Reference- Below is that video-
Below is the streetlight that I modelled-

Next was the landmark building that I was assigned which was the Seoul Trade Tower. I’ll have to admit as this was my first real model that I completely did on my own but with the help of the previous videos I was able to make the building out of one cube. While working on this building I also discovered the target weld tool which helped me in creating the 90 degree angle of the windows and the exterior.
Below is the Reference photos that I had used-


Using a reference really helped me achieve the correct look. Also I found a 3D model of the building which also helped in creating the correct shape. Which can be seen below-

Then below is the model that I created-


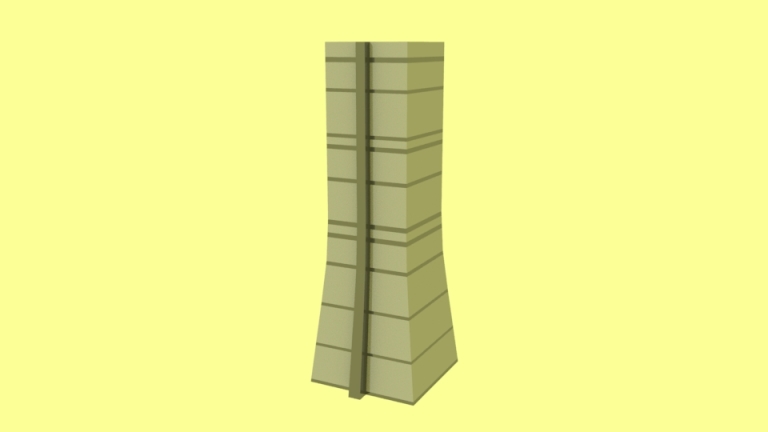
After that I attempted to create the building 63 within Seoul and to be honest it could be better but I’m happy with the overall result. For this I simply just moved the vertices and by using the multi-cut tool I was able to get the window outlines.
Below is the reference photo that I used-

Again using a reference really helped me in getting the angle correct.
Below is the piece that I modelled-

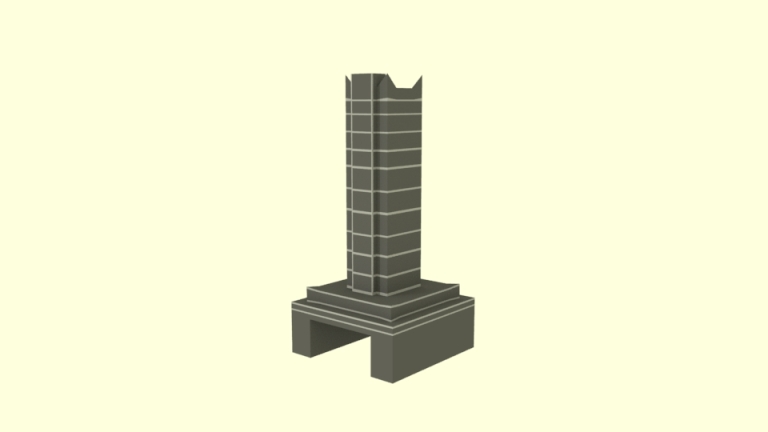
Then I looked into the Seoul National Cemetery. This was the same as the one above I simply moved the vertices to create the shapes and the extrude tool to move the faces to create the shapes needed.
Below is the image I used as a reference-

Below is the modelled that I created –

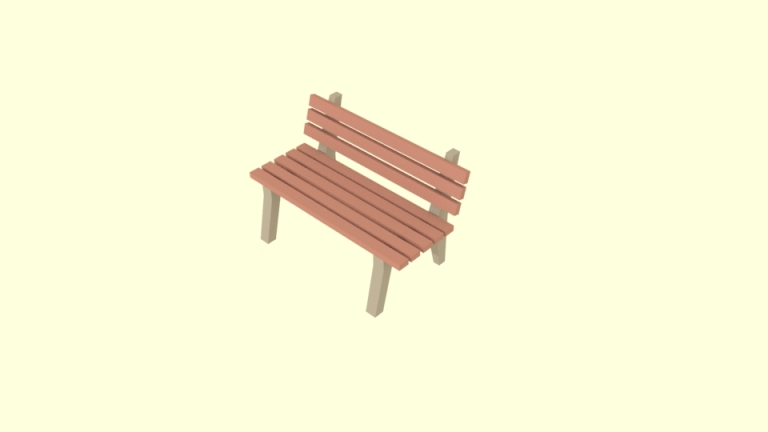
Then I decided to look at something a little more simple and used a Youtube tutorial to help me which was a bench. Below is the video that I used to help me.
Reference- Below is video used-
This video really helped me in working out how t make simple things the simple way. What I realised was that I was getting too caught up in how to make the model that I would simply just get frustrated and annoyed but once you take a minute and start to think about the solution instead of the problem you were able to get more work done.
Below is the bench that I modelled-

Which lead me to creating the generic buildings below-


After this I created my final model which was the fountain that was to be placed within the park. It was based of the fountain within Seoul’s Olympic Park as shown below-
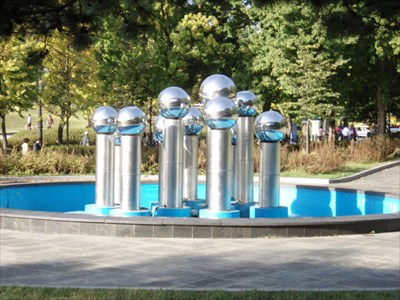
Below is my modelled piece-


Final Outcome-

First Attempt Video-
Final Video-
I made the group presentation which can be found at this link-
Reflection
Over the past few weeks working on Maya I have definitely had my ups and downs but with the help of my friends I was able to sort those problems out quickly without to much frustration. I owe a big thank you to my friend Leanna Hillen as she has helped me throughout the year and I really appreciate the help she has given me. Over the weeks I feel that I have improved while using Maya it has been slow and I know there is a lot to learn but I look forward to the challenge. Looking back over my group I think we worked really well with each other and overall I really liked what we produced I just hope its enough.
References for Images used-
- Images.www.nikken.jp. Available from: https://www.youtube.com/watch?v=_QPUqTGowiM [Accessed on 1 March 2018]
- Image. sqmegapolis.wikia.com. Available from: http://sqmegapolis.wikia.com/wiki/File:Trade_Tower.png [Accessed 1 March 2018]
- Image. Pinterest.com. Available from: https://www.pinterest.co.uk/pin/144185625539925003/?lp=true [Accessed 1 March 2018]
- Images. http://www.Korea.net. Available From: http://www.korea.net/NewsFocus/policies/view?articleId=127809 [Accessed 1 March 2018]
- Image. http://www.waymarking.com Available from: http://www.waymarking.com/waymarks/WMD75G_Mobile_Fountain_508805164951060457164851649688_Olympic_Park__Seoul_Korea [Accessed 1 March 2018]
